


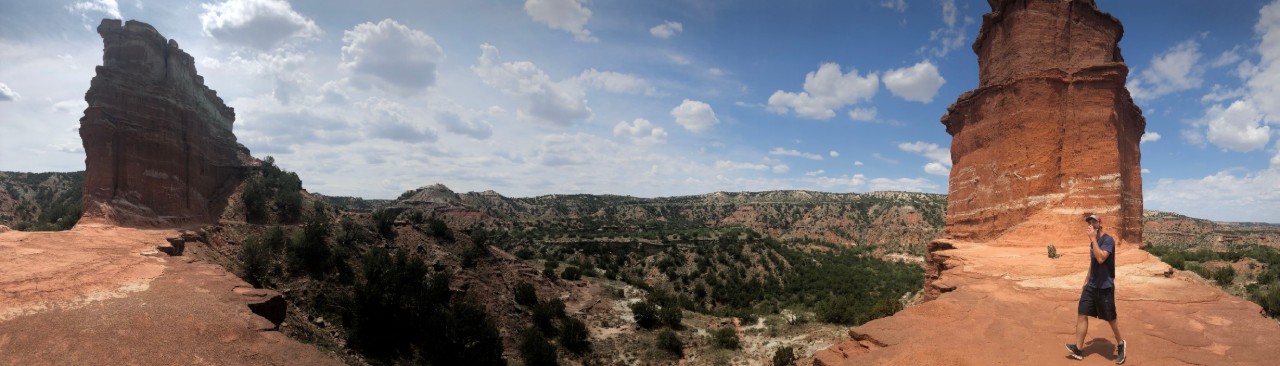
Now I’m not usually one to post stuff on Instagram, But the pictures I do take on occasion tend to be panoramas. I just wish it was easier to share them in their full glory. If you’ve ever tried to upload a panorama picture to Instagram—or if I’m being honest, any interesting horizontal picture—then you’ve likely run into issues.
Yes, you can include the whole photo in a single post, but in most cases, you have to zoom out so far to fit it all in that it’s impossible to see all the amazing detail you were trying to preserve in the first place.
Turns out, there’s an easy way around the problem: a multi-post panorama. Or more accurately, a seamless multi-post panorama.
To create one, you’ll essentially upload your single image as multiple images, similar to how you would create a slideshow on the platform, except as a person scrolls through it will look like they’re just panning across that single picture.
There are great directions by photographer influencers Becki and Chris. You can (and should) watch their YouTube tutorial below:
Here’s an overview of how to make it happen:
First, open your image in your favorite photo editing software. They suggest Lightroom, but you can use something else as well.
You ultimately want each photo you upload to have an aspect ratio of 4:5 and be 1350 x 1080. That means you’ll need to do a little math. For a two-image photo you’ll multiply 1080 x 2, which will get you to 2160. That means you’ll want to crop your original image to 2160 pixels wide; that way when you chop it into two pictures, you’ll have two images that are 1080.
After that, put it into Photoshop. Unlock the background layer, then select “View” from the top of the page followed by “New Guide Layout.” You’ll want to make sure it says “Custom” as the preset and then go to the section labeled “columns” and select the number of images you planned on making. In this case, we’ll pick two.
Make sure the “Gutter” box in that section is set to zero.
Close that out, then select the slice tool. At the top of the page, you’ll see a button that says “Slides from guides.” Click that and your image will be sliced into two equal parts.
From there, you’ll just need to “Export” and then “Save for web.” Make sure you’re exporting those files as JPEGs. You may also want to go ahead and resize them to 1350px high so Instagram won’t compress them on its end.
Once they’re exported, put them on your phone however you choose, and then they’re ready to upload to Instagram!
Now that sounds simple enough but I don’t have fancy programs like Lightroom, and Photoshop, but there is a cheaper, quicker, and easier way to do it all on your phone!
First download an app called Photoshop Mix, it’s free but does require a quick email account sign up. Once the app is open, you add a new project by clicking the plus in the top right corner, and then choose image on the next screen:

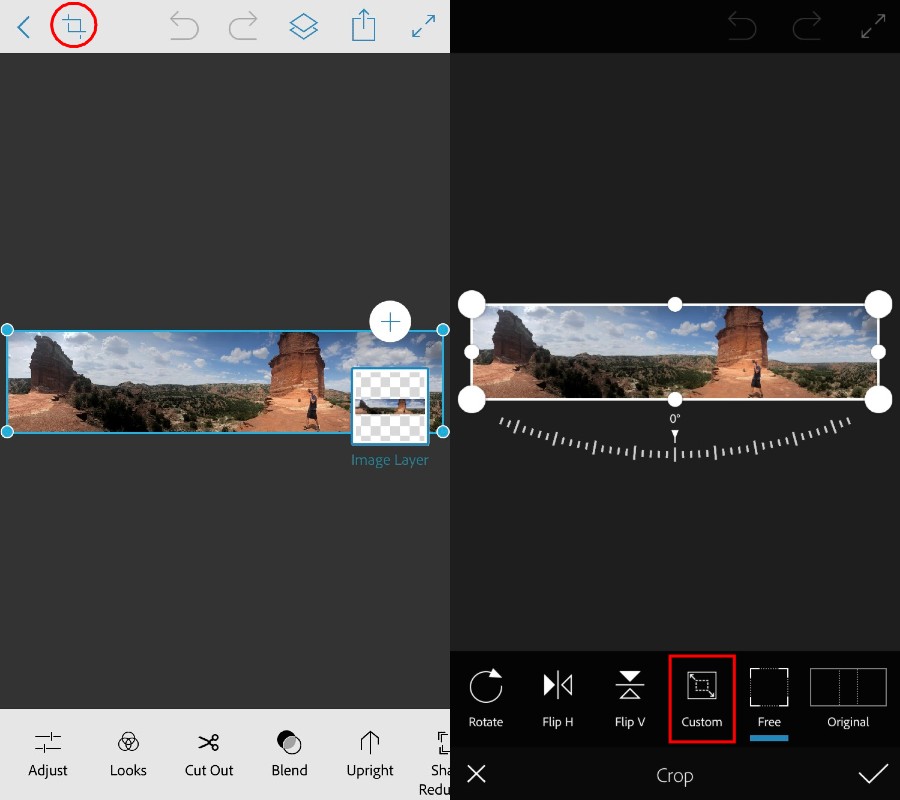
After selecting your image select crop on the top left side, and then custom in the bottom middle.
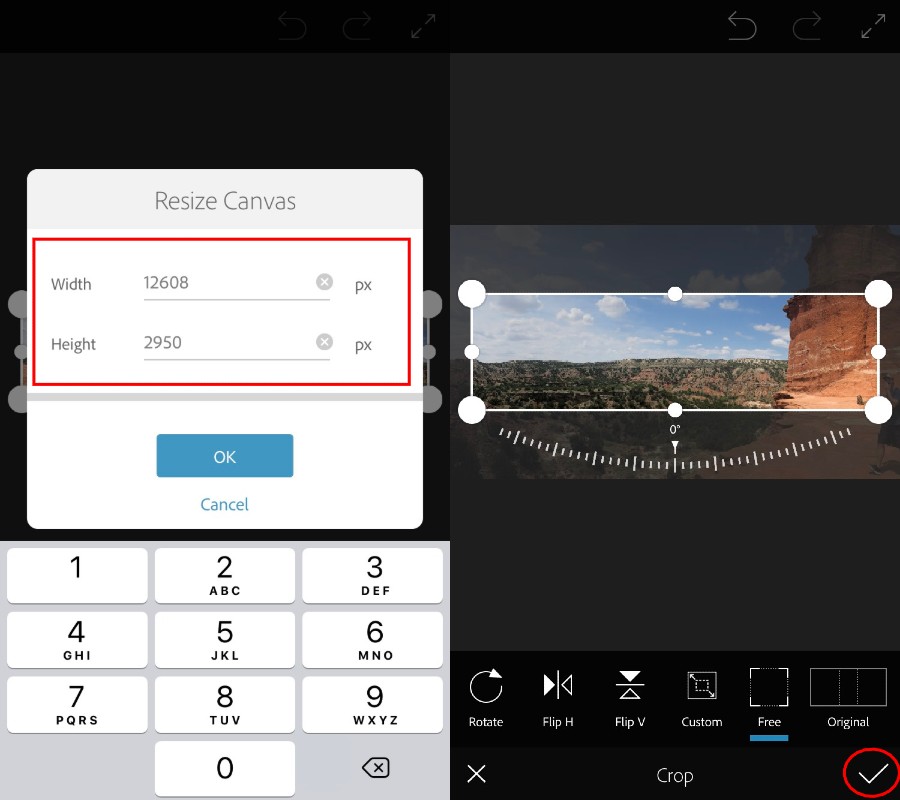
Just as mentioned above you might have to do some math to get your pixel dimensions just right, but the suggested size is 2160 width and 1350 height. The panorama I took would be longer than the 10 photos allowed in the Instagram multi post, so I just settled for 2, but had to do some math the above instructions didn’t include.
If you want a photo that is too large but still get all of it on this feature you can take the original height and divide it by 5, then multiply the answer by 8 to get the width you want to change your image to. The height universally stays the same.
Once you have your size right click OK, and then on the check mark at the bottom right of the next screen.
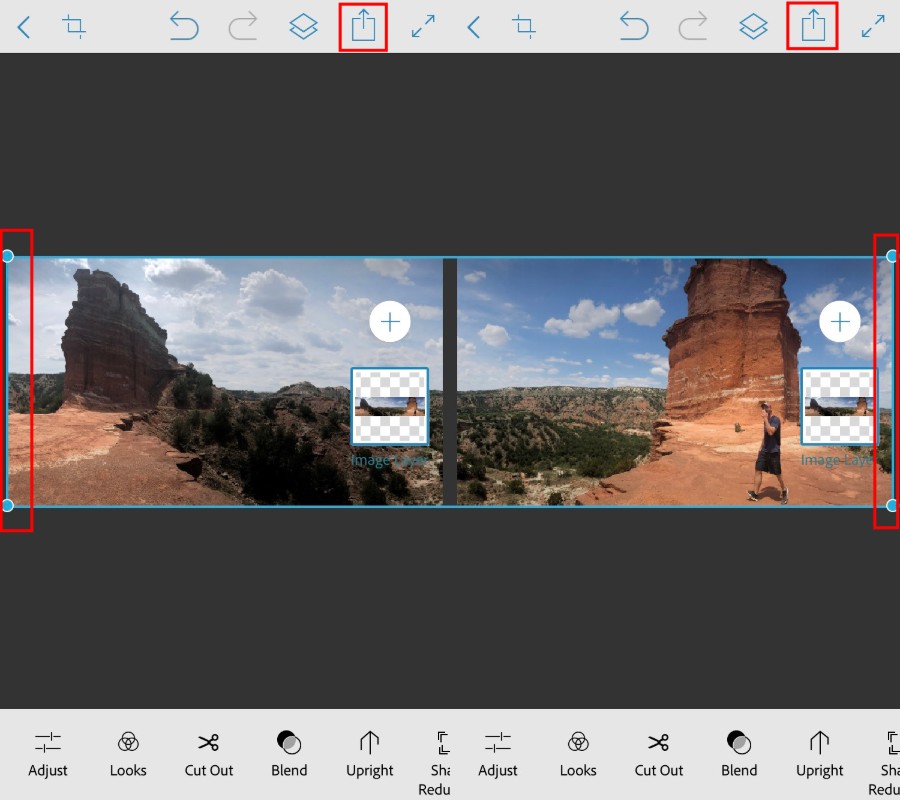
Now you want to get the picture inside the boundaries you just set, this can be a little annoying having to change your image size with your fingers but try to get the whole thing inside the blue lines that will pop up. Clicking on the dots in the corners and dragging them will be a little easier to make it the right size.
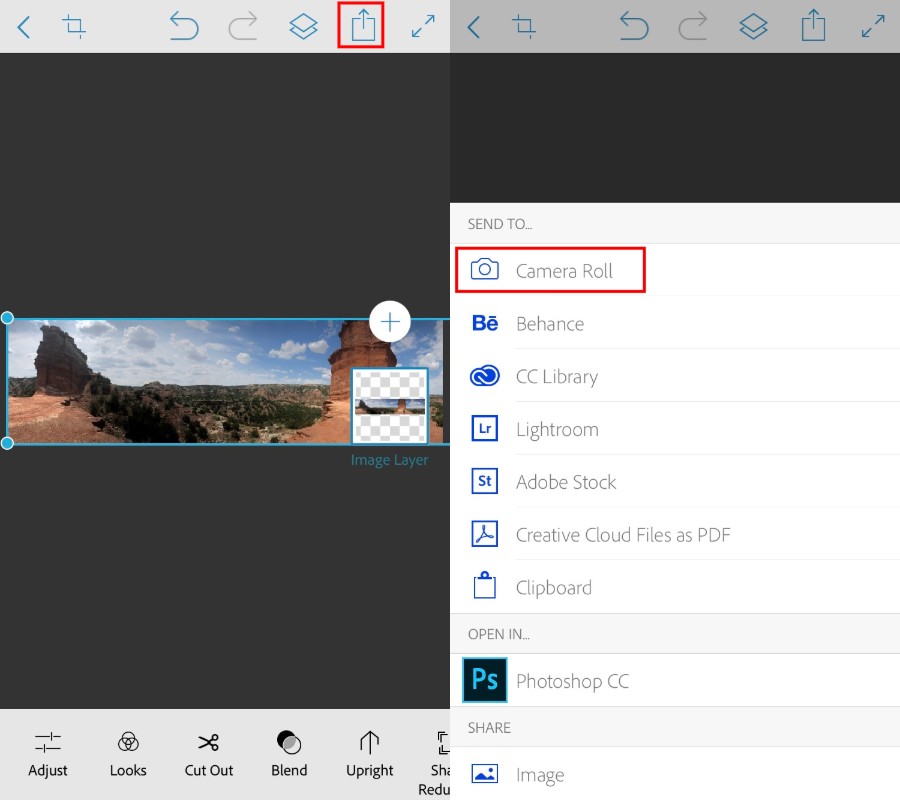
After you get the image just right, next you want to upload the photo to your camera roll by clicking the upload button on the top bar and then selecting camera roll.
Once that’s done then you open another project, and grab the image you just downloaded, once again go to crop and custom. Then set the width to 2360 and the Height stays at 1350.
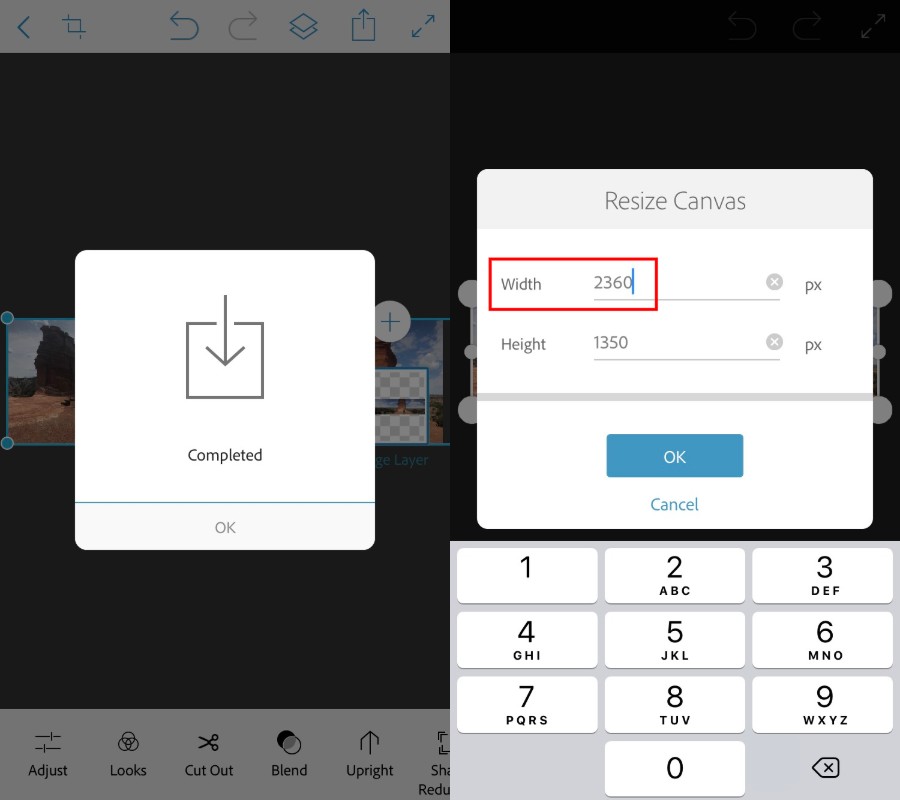
Basically this is creating half a canvas for your whole photo to fit on, so now you drag your image all the way to the right until you see the blue marks on the left side, upload that to your camera roll, then repeat in the opposite direction, and upload the right side of the photo.
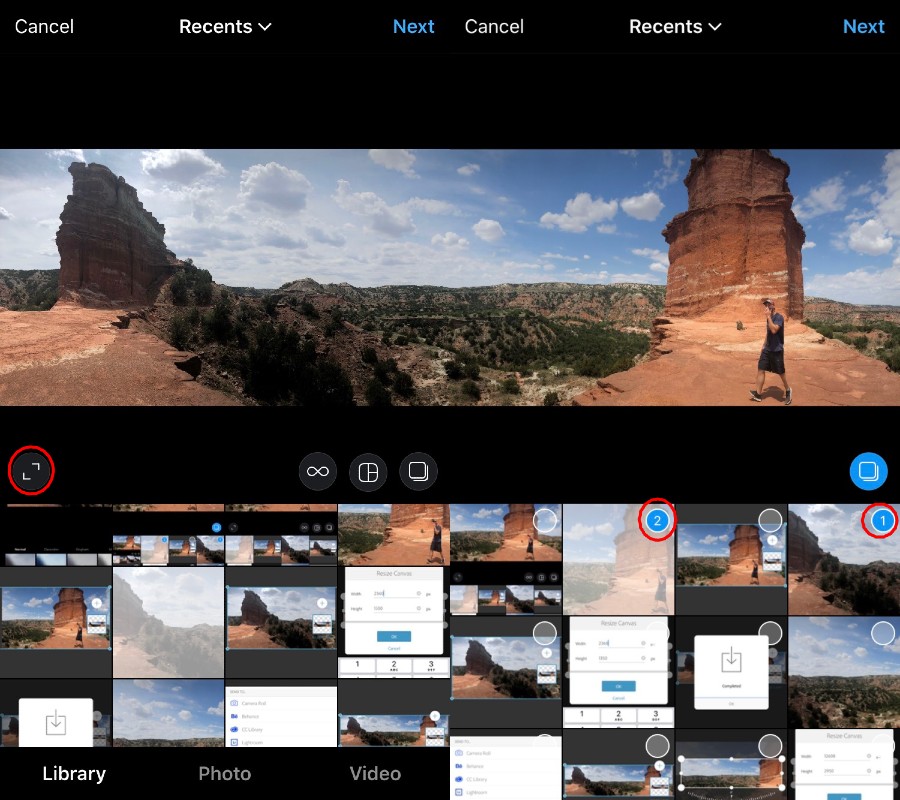
So now your images are created, and to the size they need to be, next is getting them into Instagram. Hit the plus in the box at the bottom middle, and then on the next screen make sure to hit the 2 opposite arrows before selecting multi-post. Then you just have to select them in the right order, select your filters if you want them, and hit share!
So that is how you create a seamless panorama in instagram! Here’s a video on how to do this in case my instructions and pictures didn’t help.
It looks like a lot of effort, but it’s actually really simple once you try it a few times—and it can lead to some pretty awesome-looking Instagram multi photo posts.