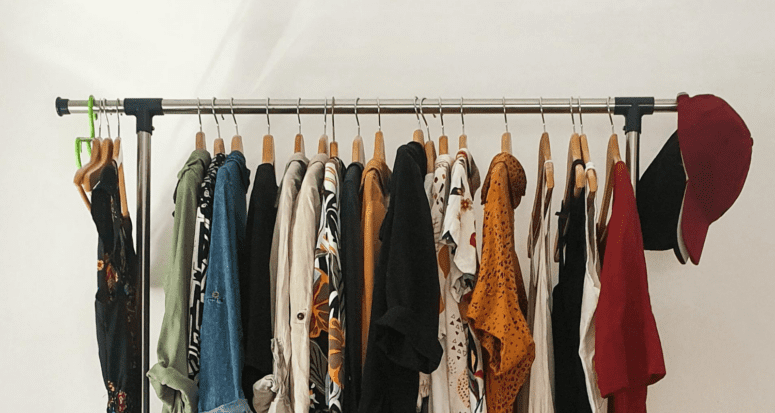
Don’t Forget Your Wardrobe! How to Pack Clothes for Moving Day
- Published on
- 8 min read
-
 Evette Zalvino Contributing AuthorClose
Evette Zalvino Contributing Author
Evette Zalvino Contributing AuthorClose
Evette Zalvino Contributing AuthorEvette is just your average HGTV fan who dreams of having a home worthy of being on one of those shows. When she isn't writing for HomeLight, she's working at her local real estate office. In her downtime, you'll find her searching for the next great hiking trail in her area.
At HomeLight, our vision is a world where every real estate transaction is simple, certain, and satisfying. Therefore, we promote strict editorial integrity in each of our posts.
It’s taken what seems like an eternity to finally get to this point. The offer has been accepted, the home inspection is complete, and the documents have been signed. Now, it’s time to start packing your belongings so you can finally start moving into your brand new abode. Do you have a plan for how to pack clothes for moving day?
We all know that if we are packing fragile items, we should wrap them in old newspapers, bubble wrap, or even soft linens so nothing is broken. We also know that we should label each box so it’s easier to figure out what goes where. But packing clothes? That’s a topic up for debate.
Some people will toss things in a garbage bag and call it a day. Others will haphazardly throw items in a moving box and be done with it. Some people will even leave the clothes in the dresser drawers, which is just a bad idea for so many reasons.
Now that you’re a responsible adult — no, a responsible homeowner — you might wonder how to pack clothes for moving day without using trash bags. (Or the best way to pack using trash bags!)
You’re in luck, because this extensive guide will show you the best way to pack your clothes for easy, stress-free moving!
Step 1: Marie Kondo your wardrobe
Do you know how much money you spend on buying clothes each year? In the 2014 Consumer Survey, the Bureau of Labor Statistics reported the average American household spent approximately $1,786 on “apparel and services” (services includes things like dry cleaning, tailoring, and so on). The report went on to state that the average American purchased 64 items and 7.5 pairs of shoes each year. Pretty astounding, isn’t it?
If those numbers sound a little farfetched, look at your own wardrobe. Can you recall the last time you wore each item? Do you even know what’s in your wardrobe?
“Clothes that have not been worn in a year or more should go to charity. Your mantra is: ‘I haven’t worn this item in 12 months, therefore I most likely don’t need it,’” Laura McKenna, a Massachusettes real estate agent with the distinction of being a Top Relocation Specialist for the past five years, recommends.
If you have a difficult time deciding what to keep or what to donate, ask yourself these questions:
- Do I love how this makes me feel and look when I wear it?
- Is this item outdated?
- Does the item look like it’s been worn a lot?
- Does the item still fit me correctly?
After going through your wardrobe, you can pat yourself on the back. The more clothing you can donate, the less you have to worry about packing — plus you’re giving back to those in need!
Note: If you are thinking about decluttering high-end items, consider selling them to a consignment shop or listing them on online marketplaces like PoshMark, ThredUp, or Mercari. You can make some extra money to help with the move, and your once-loved clothes will go to someone else who’ll enjoy wearing them just as much as you did!
Step 2: Assess your needs
After you’ve cleared out your closet and have decided what you’re keeping or donating, next you’ll want to think about what kind of clothing you’ll need and how many of each item will be ideal to have accessible during the move.
Set aside a couple of outfits of clothing for each family member while you’re packing. This allows you to pack all of your clothing and shoes without having to rummage around through boxes if your move is delayed.
Next, look at what you’re packing. Do you have a lot of clothes? Are you renting a U-Haul, hiring a moving company, or are you enlisting your friends and family for help?
Depending on your situation, you may want to consider purchasing large, clear plastic tubs so you can easily see inside. If you have enough space and extra money, you can purchase wardrobe boxes so that you can leave clothes on their hangers, which will make unpacking easier!

Step 3: Organize, organize, organize
Now that you’ve gone through your wardrobe and set aside the items you want to keep, donate, and sell… you’re still not ready to actually start packing. Instead, it’s time to organize all of your clothes! Sounds like heaps of fun, right?
The point of organizing your clothes is to help make unpacking all the more easy. This is where you can take everything you’ve learned from watching Tidying Up with Marie Kondo and put it in use.
Sorting the delicates
Delicate items don’t just include your undergarments (but we’ll discuss how to pack those, too). It can include items that are only worn for special occasions, such as formal wear, a wedding dress, a tuxedo, and any special accessories.
When going through your delicate items, you may already have them in garment bags to protect them from dust and odors. If they’re not bagged, this is your first step.
Next, you can put the bagged garments in boxes like the U-Haul Grand Wardrobe Box to hang the garments to ensure there’s minimal wrinkling. Just be sure you aren’t using wire hangers! (They really can damage delicate clothes.)
Pro tip: Instead of putting each garment in its own bag, you can put several garments together in one bag. There’s no need to be wasteful! If you don’t own garment bags, clean garbage bags can work, too.
Sorting by type of clothing or season
After going through the clothes you’re going to keep and separating the delicate garb, now you’ll want to sort according to season.
For example, if you’re moving in summer, you’ll start by putting all of your winter clothing together. Much like with the delicates, you can leave jackets, winter coats, and other outwear on the hangers and put them in a garment box. In a separate box, you can pack your hats, gloves, scarves, and other winter accessories together so it’ll be easier to find them.
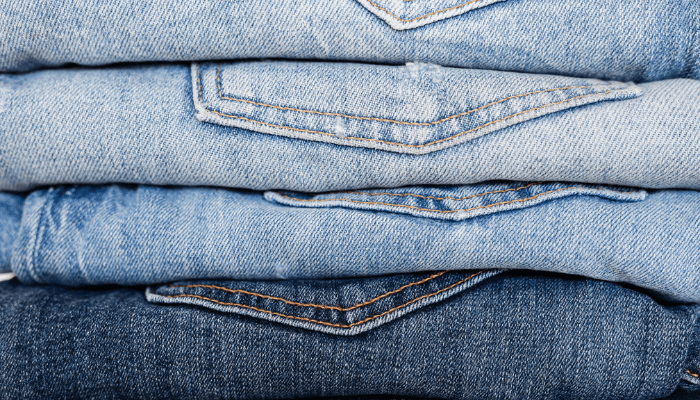
To sort by types of clothing, it can help to start with bottom pieces and then work your way up your wardrobe. First, put all of your jeans together, then your work pants, dress pants, workout shorts, and skirts. Do this for the rest of your wardrobe: sweaters, T-shirts, blazers, and so on.
If you’re living a minimalist lifestyle and only have a capsule wardrobe, you may be able to get away with packing everything in two boxes — one for bottoms and one for tops.
On the other end of the spectrum, if you have a massive wardrobe (even after sorting through your closet and discarding anything you don’t love), you can go one step further and sort your clothing by color family.
Step #4: Don’t forget the finer details
Clean clothes
Before packing anything, make sure they are clean! You don’t want to take piles of dirty clothing with you to the new place!
If you have clothing that needs to be dry-cleaned, now is the perfect time to do that. Not only will the garments be clean and pressed, they’re likely to be stored in garment bags for you (or at least in a plastic bag on a hanger) to keep them clean.
Proper folding
Folding clothes is probably one of everyone’s least favorite chores, but it must be done! If you’re of the “roll it in a ball and stuff it in a drawer” camp, that’ll be a nightmare to unpack.
Besides, balled-up clothes take up a lot more room than you think. Remember, the name of the game for packing clothes is to be neat and organized to save space and time.
Here are a few methods that work well when packing.
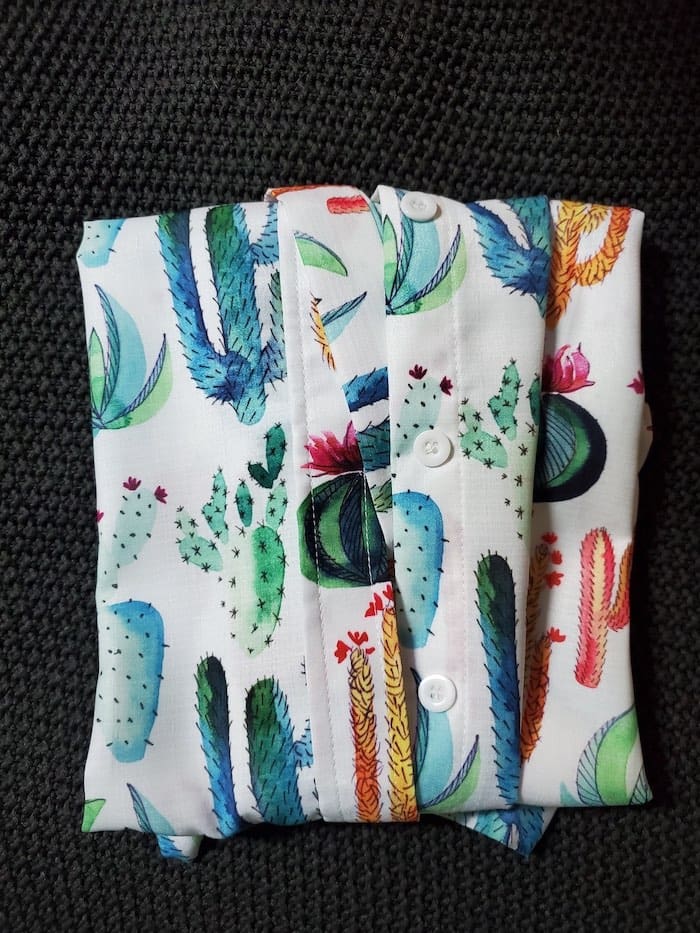
Flat folding
This method of folding is the most common way people fold their clothing. It’s easy, quick, and works fine at keeping your clothes wrinkle-free.
To do the flat fold, first lay the shirt on a flat surface with the back of it facing up.
Next, smooth out any wrinkles and fold one side of the shirt toward the center.
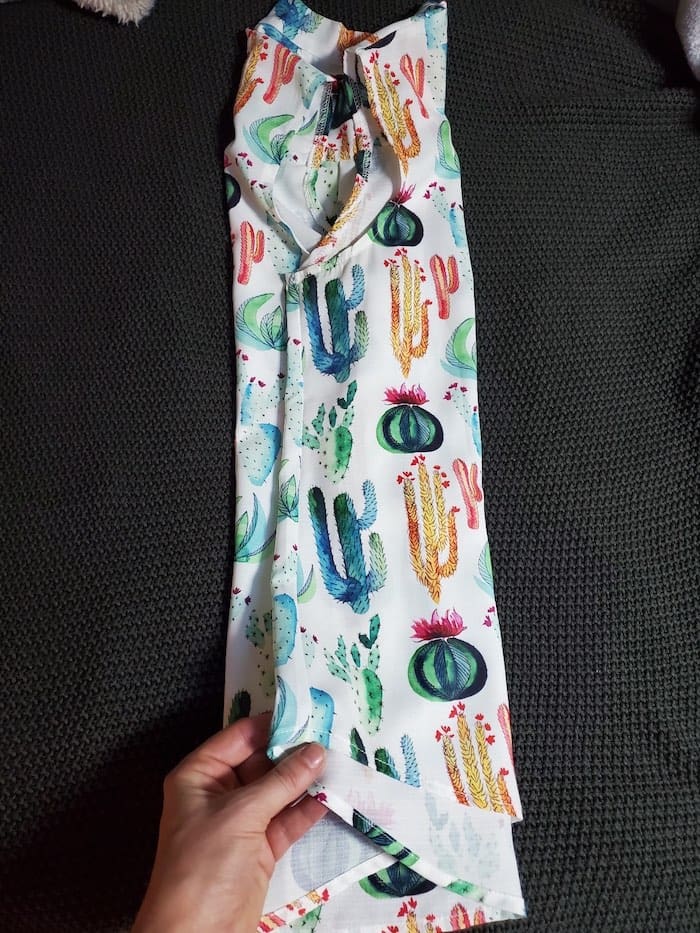
Repeat this with the other side, folding the shirt into thirds. You want to make sure the sleeves are laying flat so you have a neat fold (if you are folding a long sleeve shirt, you can fold the sleeve diagonally at the elbow to get them to lay flat).

Then, take the bottom third of the shirt and fold it upward twice so that the fold meets the collar.
To fold your pants, simply lay them flat and fold them in half lengthwise. Smooth the legs and then fold them into thirds.
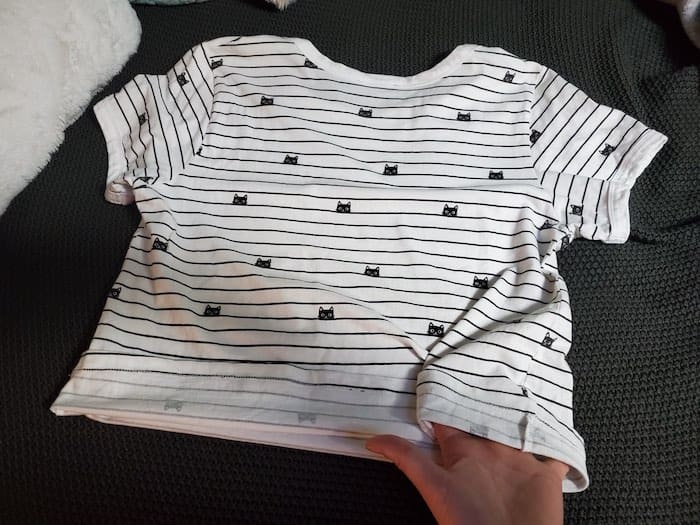
KonMari folding
Marie Kondo is the master of tidying up and can teach you how to declutter just about every inch of your home! Her folding method is similar to flat folding.

Lay the shirt on a flat surface with the back facing up.

Fold the bottom of the shirt halfway up the shirt.
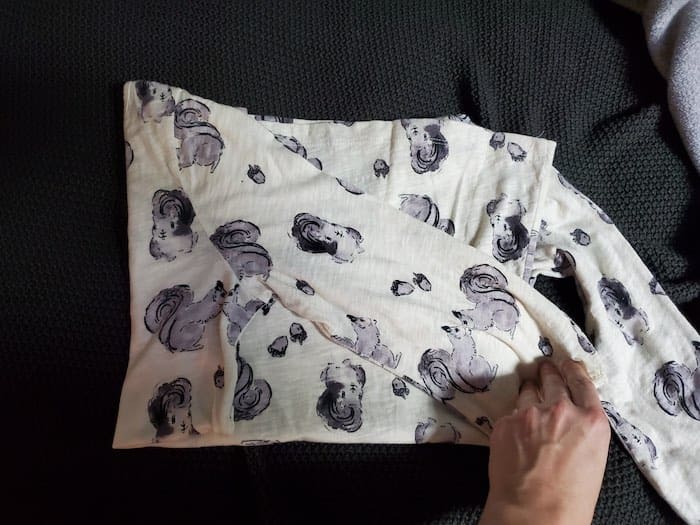
Smooth out the wrinkles (if there are any) and fold one side of the shirt toward the center.

If the shirt has long sleeves, fold the sleeve over as well.

Then repeat this step on the other side.
Check out her YouTube video and see the master at work!
Military roll-up
This method is probably the best way to fold your clothes because it saves a lot of space when you’re packing or even putting clothes drawers, but it does wrinkle clothes more than folding would.
To do the military roll, lay the shirt face down on a flat surface.
Take the bottom hem of the shirt (about three inches will suffice) and flip it inside out.

Fold one half of the shirt so that it is touching the center of the shirt, and fold in the sleeve on that side.

Take the other half of the shirt and fold it over the first half.

Fold the other sleeve in.

Now we roll. Start at the top of the shirt and roll downward as tightly as you can.

Remember that inside-out part of the shirt? This will create a pouch that you’ll want to fold over the rolled up shirt.
Check out this video to see this method in action.
Choose the best container for packing
There are a variety of options when it comes to packing clothing. You have the typical cardboard box, plastic tote bins, suitcases, duffel bags, and more! With so many options, what would be the best one to use for clothing?
The answer depends on what you’re packing.
Cardboard boxes
Cardboard boxes are the most common option because they’re easy to find and fairly inexpensive. U-Haul stores have a service called “U-Haul Customer Connect” at any of their locations where folks can leave their used moving boxes. This service is great for those who are short on funds or those who care about the environment — or both! U-Haul Customer Connect also offers other services for those in the armed forces and students heading off to college.
Of course, you can find free boxes anywhere — Craigslist, Facebook communities, grocery stores, and liquor stores, to name a few. We recommend using cardboard boxes to pack tops and bottoms, since they can be folded flat.
To pack your cardboard boxes, follow these steps:
- Choose a box that is going to be easy to carry and won’t be too heavy when it’s full. Make sure the box is assembled properly and you’re using enough packing tape to ensure the box won’t fall apart.
- Use packing paper or plastic wrap to line the inside of your boxes. By doing this, your clothes will be protected from water damage or any other issues that may occur during the move.
- Put your folded clothes in the box neatly. We recommend using the flat fold or the KonMari fold because it’ll make unpacking a breeze.
- Place a layer of packing paper on top of the stack of clothes and then close up the box and secure it with packing tape. Label the box with a black marker.
Wardrobe boxes
Wardrobe boxes are great for nicer clothes that you normally store hanging up in a closet. This includes business attire, dresses, formal wear, and blazers or jackets. The chances of finding a wardrobe box or five for free is slim, but they aren’t too expensive. U-Haul offers them for less than $13.
To assemble your wardrobe box, follow these steps:
- Assemble the bottom of the box first by flipping in the short flaps and then flipping the long flaps over them. Use packing tape to secure the flaps.
- Flip the box over and put the hanger bar in the cutouts found on the crease at the top of the box.
- When the bar is secure, start hanging your clothes on the bar (we recommend only hanging 8 to 10 pieces so it doesn’t get too heavy).
- When you’ve finished hanging your garments, close the two long flaps at the top. You’ll see that there’s a cutout in the middle.
- Finally, take the two short flaps and bend the outer edges down. When you close these flaps, they should fit into the hole. Secure the flaps with packing tape.
If you get stuck, this YouTube video should help.
Suitcases
For those with suitcases, you can use them instead of buying a bunch of boxes, thus saving you money! You can use suitcases to pack anything you may need for your moving day and the next couple of days afterward. This includes clothing, toiletries, chargers, and other electronics. And if you have more suitcases, use them to pack even more clothes.
To pack a suitcase, follow these steps:
- Use packing paper or plastic in soft-shell suitcases to protect your items. If you have a hard-shell suitcase, you can skip this step.
- Place your clothing inside the suitcase. We recommend the military rolling method because you can fit more clothing inside. You can also use packing cubes to organize your items in the suitcase, as well as fit more things inside the space.
- If you’re packing shoes, utilize the inside of the shoe by stuffing it with clean socks or other small items. Also, make sure that your shoes are free of dirt and debris so the items in your suitcases stay clean.
- If you’re going to be living out of your suitcase for a couple of days, pack an empty plastic bag so you can put your dirty clothes in it, thus keeping the rest of the clothing clean.
Duffel bags
Packing with a duffel bag should be pretty simple, right? Just open the bag and put stuff inside!
Well, yes and no. You’ll want to put your shoes and items you aren’t going to need right away in the bag first. Then you’ll want to pack your clothing, toiletries, and other items on top.
Pro tip: Always use the military rolling method when packing a duffel bag, and place the rolled clothing lengthwise to maximize the space.
Vacuum bags
Vacuum bags are a fantastic way to pack many pieces of clothing without taking up a lot of space. People usually use vacuum bags when they’re packing large items like blankets, towels, or heavy winter jackets; however, you can use the rolling method on your regular clothes and pack them, too.
What’s great about vacuum bags is that you can leave seasonal items or items you don’t need right away in the vacuum bag until you need them. Since the air will be sucked out of the bag, it won’t take up a lot of space, and your clothes will be protected from moisture, odors, and more.
To pack your vacuum bag, follow these steps:
- Place the items you’d like to pack inside the bag. Make sure they’re laying flat to maximize space.
- Squeeze out as much air as your can before sealing the bag.
- These bags usually have a valve on them to which you can connect a vacuum hose. Turn your vacuum on to suck out the rest of the air.
- Remove the hose and close the valve quickly to prevent any air from seeping back inside.

Step 5: Keep clothing for each family member or room separate
This should go without saying, but you’ll save yourself a massive headache by packing each family member’s clothing into their own boxes.
Also, you’ll want to pack all towels and washcloths in their own boxes, along with bathroom rugs, shower curtains, dish towels, and dish cloths.
Remember: You should always label the boxes or use masking tape to create labels if you’re using plastic tubs. Not only can you direct the movers to put the right boxes in the right rooms, but unpacking and putting the clothes away will also be so much easier.
Pro tip: If you’re running out of newspaper or bubble wrap for fragile items in the kitchen, such as glasses and plates, you can use the dish towels and dish cloths to protect them. For example, you can place dish towels in between plates, or wrap dish cloths around glasses.
Step 6: Packing shoes
When you’re packing your shoes, you don’t want to throw them haphazardly into a box. It’ll be a nightmare trying to pair them all together once you’re at the new place. Plus, by throwing everything together, your shoes could become damaged in the process. You don’t want to toss your most expensive pair of high heels in a box with your hiking boots!
“I personally like to put each pair of shoes in a plastic shopping bag before putting them in a box,” McKenna says.
For those with extensive shoe collections, you may want to consider something like underbed shoe storage. These storage units can hold 12 pairs of shoes, each pair fitting in their own little compartment.
Of course, if you have larger shoes like boots or high heels, they may not fit in the storage unit, and your best bet would be to use the bag-and-box method McKenna suggested.
Pro tip: Before tucking your shoes in an underbed shoe storage unit or using the plastic- bag- and- box method, make sure your shoes are free of any dirt and debris. Take sneakers, boots, and other outdoor footwear outside and knocksmash the bottoms of the shoes together. This will knock off any dirt. If there are rocks in the treads of the shoes, make sure to pick them out.
Final words about how to pack clothes for moving day
As moving day approaches, there’s a lot that needs to be packed. But, like other items in your home, you need to make sure everything is organized, labeled, and packed appropriately so that when you’re ready to unpack, you aren’t going to be overwhelmed.
Packing your clothes may seem like a simple task, especially if you thought you could get away with tossing everything into boxes without rhyme or reason. However, when you take some time to go through all of your clothes, donate what you don’t want and organize them before packing, you’d be surprised by how smoothly unpacking will go.
McKenna shares one final piece of advice, “Don’t forget to take yourself out to dinner, play a game of golf, or treat yourself to a mani-pedi after you’ve completed this important task!”
Header Image Source: (Sonia Sanmartin / Unsplash)